Uncategorized
Windows 11 iCloud Setup: Sync All Your Apple Data
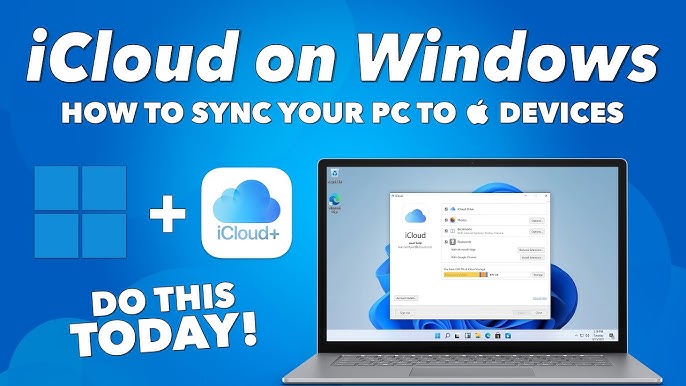
For users of both Apple and Windows devices, managing data between platforms can be challenging. With iCloud sync Windows 11 setup guide, you can access your Apple data seamlessly across your Windows devices. This comprehensive guide walks you through the essential steps to ensure smooth syncing of photos, contacts, files, and more from your Apple ecosystem to Windows 11.
How to Set Up iCloud Sync on Windows 11
Before you start, make sure you have an Apple ID and have enabled iCloud on your Apple devices. By following these steps, you can quickly set up iCloud sync on Windows 11 and ensure all your critical data is readily available.
1. Download iCloud for Windows
iCloud for Windows is a dedicated app provided by Apple, designed to allow seamless access to iCloud services.
Steps to Download and Install iCloud for Windows:
- Open the Microsoft Store on your Windows 11 device.
- Search for “iCloud” and select the app from the results.
- Click “Get” to download and install iCloud for Windows.
- Once the installation is complete, open the iCloud application and sign in with your Apple ID.
Having iCloud for Windows installed is a key part of the iCloud sync Windows 11 setup guide. This app will allow you to access iCloud Drive, Photos, Mail, Contacts, Calendars, and Bookmarks.
2. Configure iCloud Settings
After installing iCloud for Windows, you’ll need to configure your settings to sync specific data types.
Steps to Configure iCloud for Windows Settings:
- Open the iCloud app on your Windows 11 device.
- Choose the types of data you want to sync, such as Photos, Contacts, Calendars, iCloud Drive, and Bookmarks.
- Click Apply to save your settings.
Each data type has unique configuration options, which allow you to personalize the sync experience:
- Photos: You can enable “iCloud Photos” to automatically download and upload photos to iCloud from your Windows device.
- iCloud Drive: Enables access to files saved on your iCloud Drive. This feature is ideal for managing documents across devices.
- Mail, Contacts, Calendars: Sync your email, contacts, and calendar events between Apple and Windows devices.
- Bookmarks: Syncs bookmarks across browsers, including Chrome, Firefox, and Edge.
This configuration process is central to ensuring the effectiveness of the iCloud sync Windows 11 setup guide.
3. Enable Automatic Backup and Updates
To keep your data up-to-date, it’s essential to enable automatic backups and updates within iCloud.
Steps to Enable Automatic Backup:
- Open the iCloud app on Windows.
- Go to the iCloud Drive or Photos tab.
- Make sure that options for automatic uploads and updates are enabled.
Automatic backup will keep your files and photos in sync without requiring manual uploads, which is especially helpful for users juggling multiple devices.
Optimizing iCloud Sync Performance on Windows 11
Performance optimization ensures that your iCloud sync experience is smooth and uninterrupted. Here are some effective techniques to help iCloud run efficiently on Windows 11.
1. Manage Storage Space
Insufficient storage space on iCloud or your Windows device can hinder the syncing process.
Tips to Manage iCloud Storage:
- Check your available storage by opening the iCloud app and navigating to Storage.
- Delete old files or transfer them to a physical drive if your storage is nearing capacity.
- Upgrade your iCloud storage plan if necessary to keep everything in sync.
2. Regularly Update the iCloud App
Apple often releases updates to improve compatibility and performance on Windows systems. By keeping iCloud updated, you’ll ensure that the app runs smoothly and avoids compatibility issues with Windows 11.
Steps to Update iCloud on Windows 11:
- Open the Microsoft Store and go to the Library section.
- Find iCloud in the list and check for updates.
- Click “Update” if an update is available.
3. Use High-Speed Internet
iCloud sync relies on your internet connection. A high-speed connection improves the synchronization speed, especially when uploading or downloading large files.
Troubleshooting iCloud Sync on Windows 11
If you experience syncing issues, there are a few troubleshooting steps you can follow to resolve common problems.
1. Verify Apple ID Credentials
Incorrect credentials can prevent access to your iCloud data.
Steps to Verify Your Apple ID:
- Open the iCloud app on Windows.
- Make sure you’re signed in with the correct Apple ID.
- Re-enter your credentials if prompted, and check for any Apple ID verification requests.
2. Check System Compatibility
iCloud sync requires a compatible version of Windows and an up-to-date iCloud app. Check Apple’s website for minimum requirements, and make sure you’re running the latest version of Windows 11.

3. Reinstall iCloud for Windows
If the iCloud app is not functioning properly, reinstalling it may resolve the issue. Uninstall the app from the Windows Control Panel, restart your computer, and then reinstall it from the Microsoft Store.
4. Clear iCloud Cache
Clearing cache files may resolve minor syncing issues.
Steps to Clear iCloud Cache on Windows:
- Close the iCloud app.
- Navigate to C:\Users[Your Username]\AppData\Local\Apple Inc\iCloud.
- Delete the cache files in this folder.
FAQs
Yes, by enabling iCloud Photos in the iCloud for Windows app, you can sync your iCloud Photos library and view, upload, or download photos directly on your Windows device.
To sync iCloud Drive, install iCloud for Windows, and ensure the iCloud Drive option is checked. Your iCloud Drive files will be available in the File Explorer.
If you encounter syncing issues, ensure you’re signed in with the correct Apple ID, check for software updates, and try reinstalling the iCloud app.
Yes, iCloud Mail can be synced to Windows 11 through the iCloud for Windows app. You can also set up iCloud Mail in the Windows Mail app for easier access.
If iCloud doesn’t meet your needs, consider using OneDrive, Google Drive, or other cloud storage solutions. However, these may not sync all Apple data types like Photos or Contacts.

